Installation Procedure
Install the Ayla CoAP agent on the Quectel BG96 module as follows:
|
NOTE |
The installation environment is Windows. |
- Complete the steps below to generate the factory file, which is used to configure the device to access the Ayla Cloud.
- Unpack the Ayla CoAP agent release file. Below is an example of the directory tree. Note that the format of the release file is prod_pkg-AY001QCT1-<version number>.zip, for example, prod_pkg-AY001QCT1-2.2.1.zip.
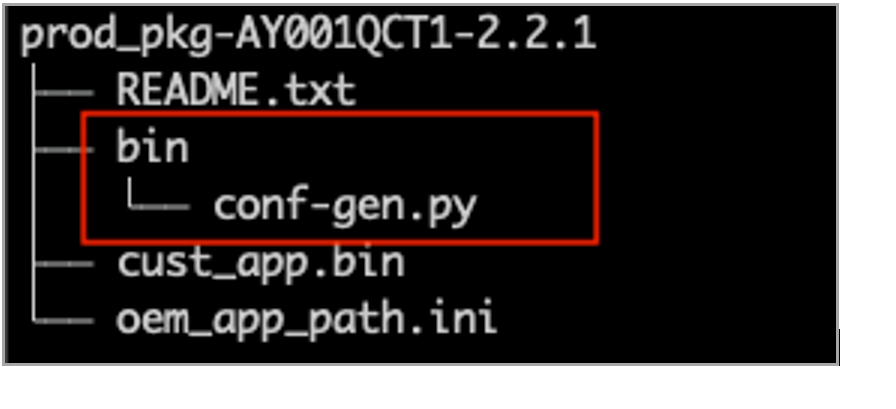
- Use bin/conf-get.py to generate the factory file by issuing the following:
conf-gen.py --oem-key <OEM_KEY> --region {US,CN} –conf-port 5684 <DSN>.xml <OEM_ID> <OEM_Model>
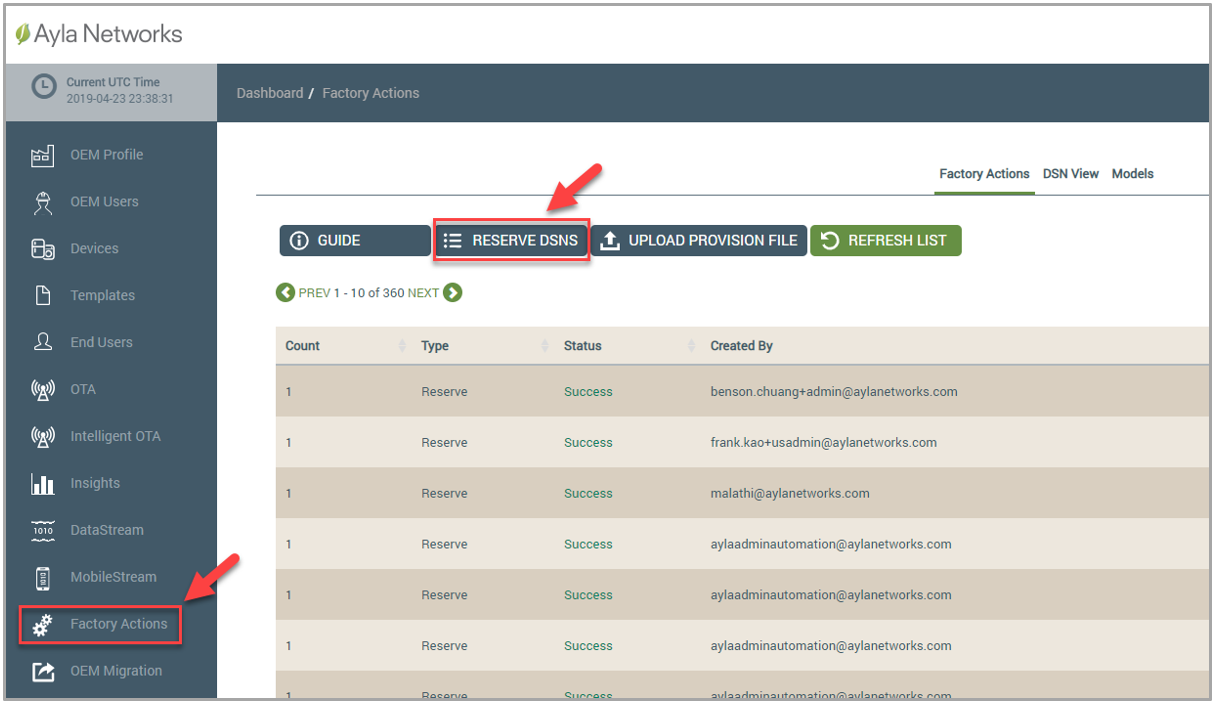
- The <DSN>.xml is the reserved file in Factory Actions on the Ayla Customer Dashboard. In the dashboard, click Factory Actions and then the RESERVE DSNS button, as shown below:
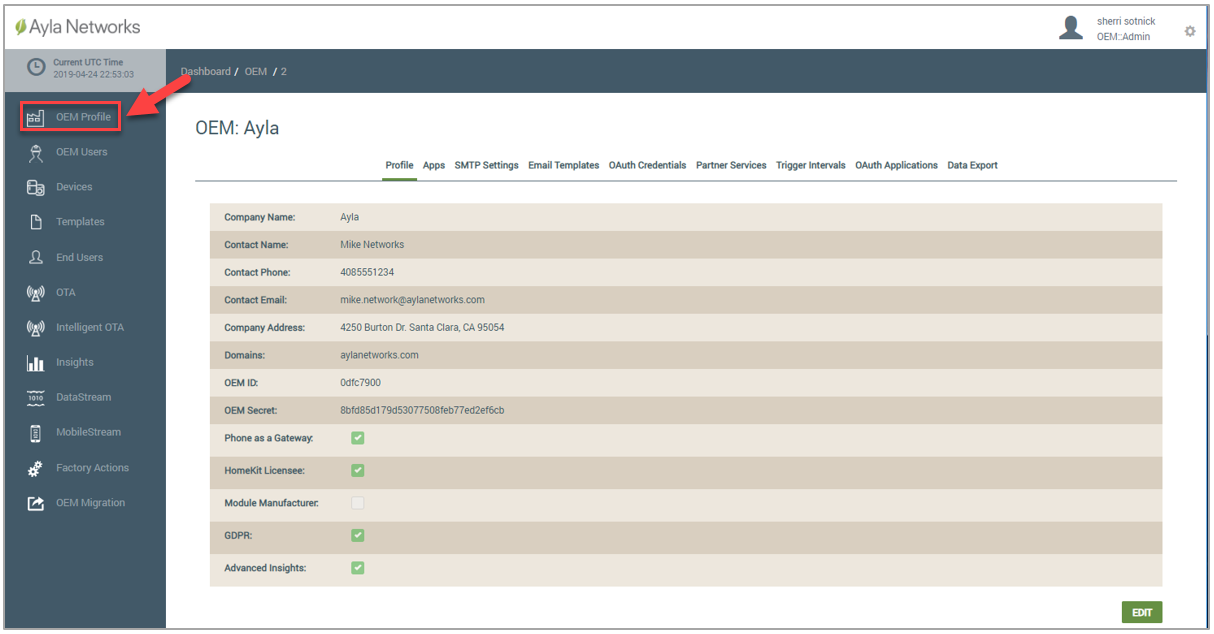
- The <OEM_KEY> and <OEM_ID> are in the OEM Profile in the Ayla Customer Dashboard, as shown below:
- Rename the conf.out file generated to "factory."
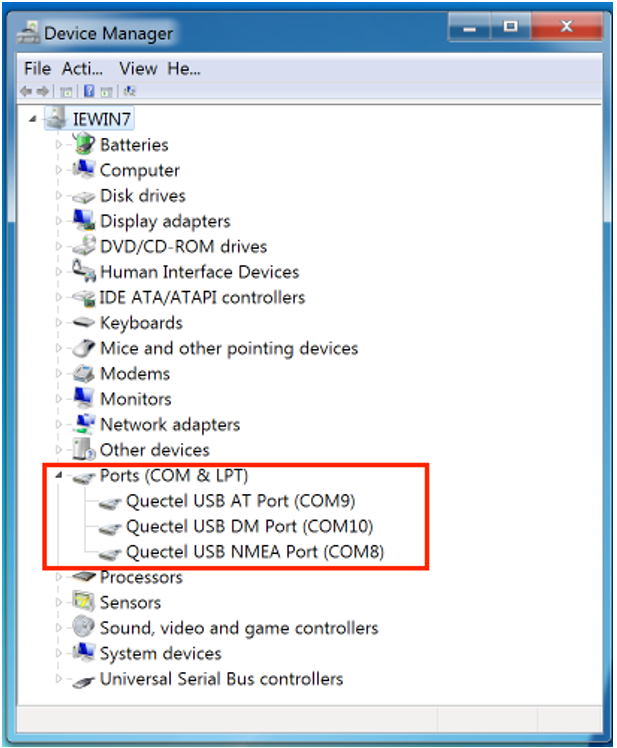
- Install the Quectel USB driver by running its setup.exe and then reset the BG96 board. You should be able to see these COM ports in the device manager, as shown below:
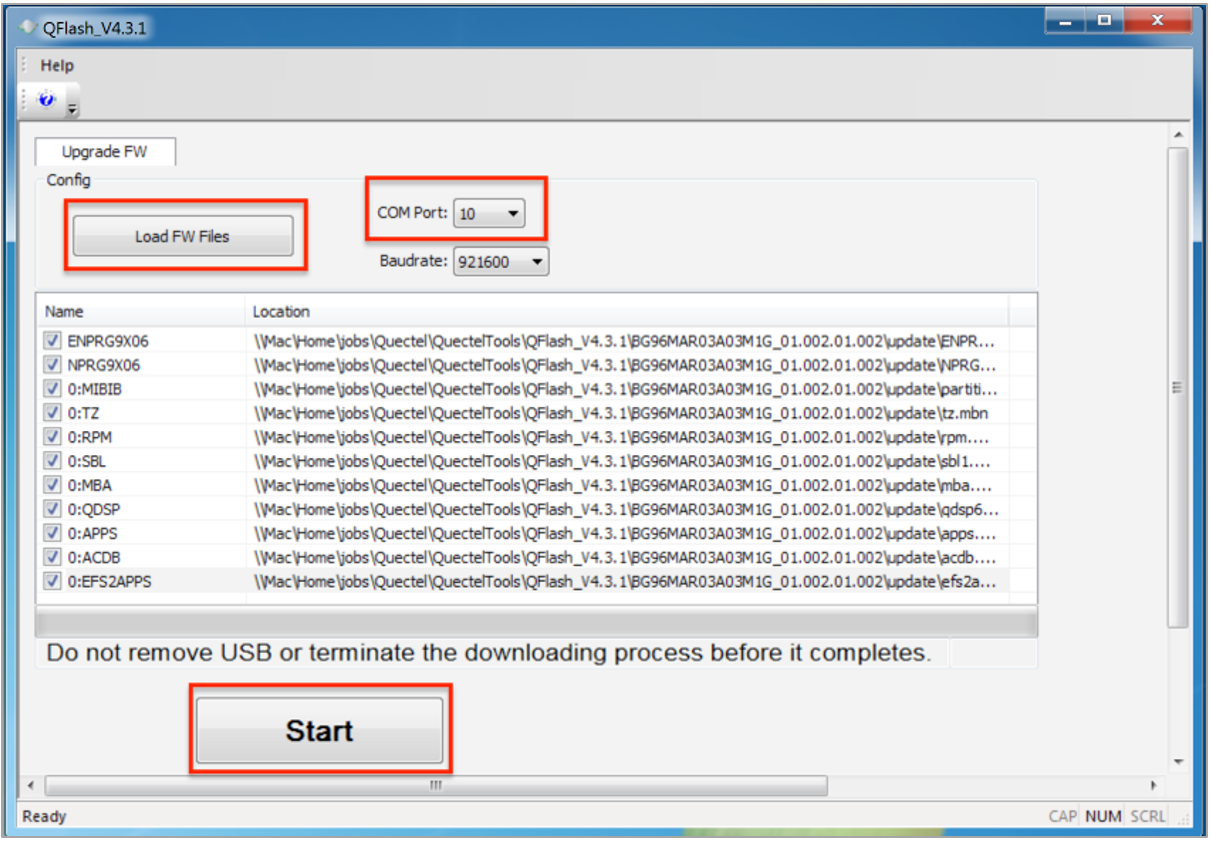
- Install the BG96 module firmware as follows (also refer to the example below the steps):
- Run the QFlash.exe.
- Choose the USB DM port as the COM port.
- Click the Load FW Files button to install the firmware.
- Click the Start button to burn the firmware.
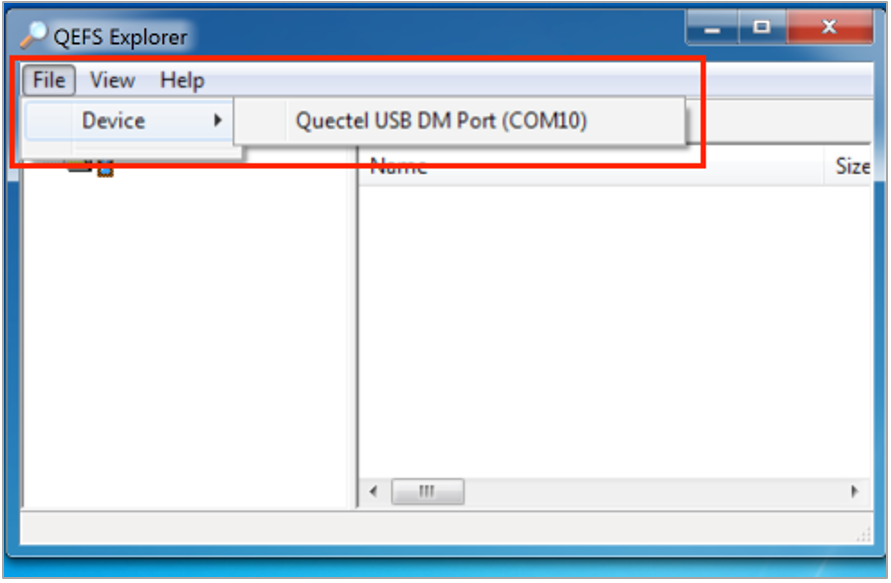
- Install the embedded Ayla CoAP agent, as follows:
- Run the Quectel_EFS_Explorer.
- Click File then Device to open the DM COM port (see the example below).
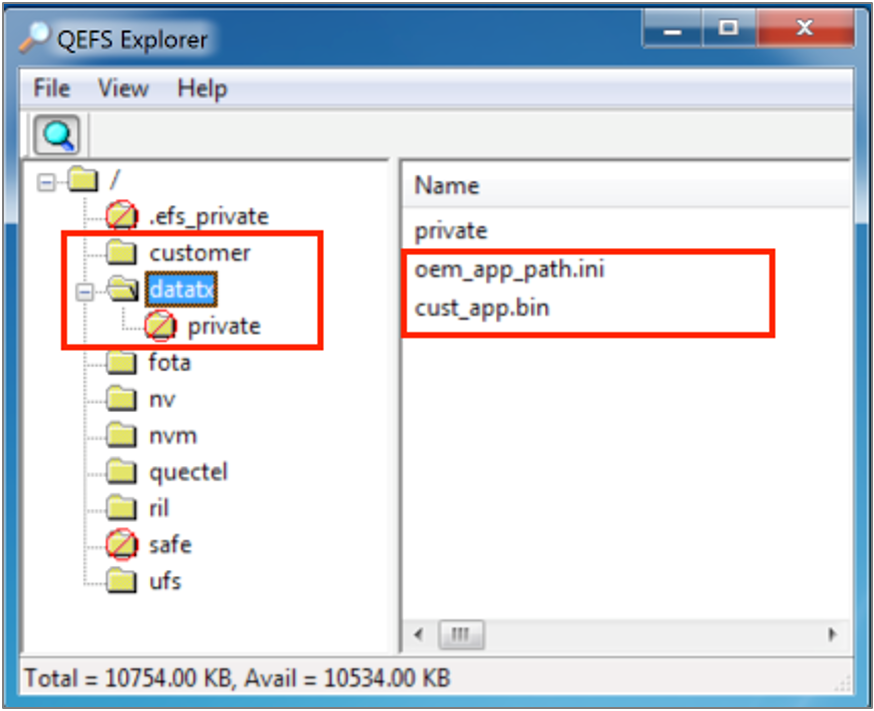
- Click the magnifier icon to reveal file system.
- Under the root directory (/), create a new directory called "customer." The name of the directory, "customer," is case-sensitive, so make sure it is all lower-case letters.
- Copy the factory file (you generated and renamed in Step 1c) to this customer directory.
- Copy the oem_app_path.ini and cust_app.bin to the directory called datatx; see the example below:
After completing the installation steps above, you have to configure the module to access the base station.
Please click here to let us know how we're doing. Thank you.